Beginners guide
Contents
Starting Out: Novice Island
Creating your character'
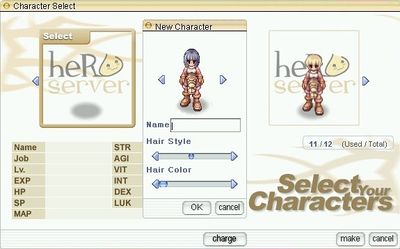
In the character creation window, you can choose your name, hairstyle, and hair color. You can do your stats in game as you will begin with all stats at 1 and you will have 48 stat points to distribute. You can also reset your stats later in Prontera City. Create a nice name.
Now you have decided on your character name and what class it will be (or even if you haven't) You will be transferred to the starting map.
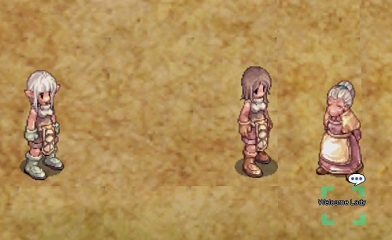
Talk to the Welcome Lady. She will explain the rules and you have to do a little quiz, to see if you know the server rules.
If it's your first character on your account that talks to her you have to complete the quiz. For characters after that you can choose if you want to skip the quiz or not. However for completing the quiz you get a free OPB and the first 3 characters a free Field Manual.
When you complete the quiz on your first character on your account you get welcome gears, which are a real help. You get:
- Little Lamb Hood
- +100 HP, While the wearer is level 30 or below the hat has 50% chance to give zeny when a monster is killed.
- Adventurer Cloth
- +100 HP, While the wearer is level 30 or below it gives +10 ATK and +10 Hit.
- Adventurer Knife
- While the wearer is level 30 or below it gives +10 ATK and +10 Hit.
If you completed the quiz or skip the quiz you have a choice to go to the Training Grounds or to Town.
Training Grounds
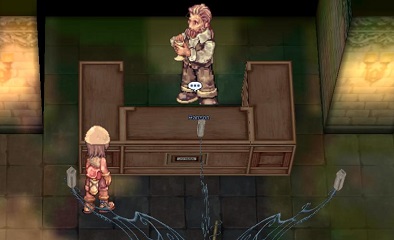
When you pick Training Grounds you will be warped to a small room with 2 NPC's.
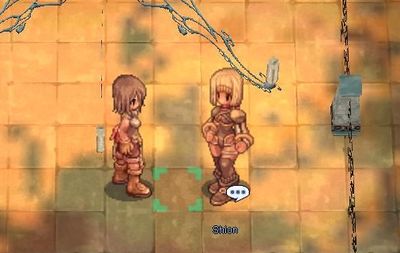
1. Talk to Shion.
Talk to her twice. You will get 1 Base level.
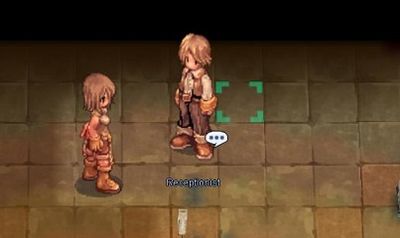
2. Now talk to the Receptionist.
He will ask for your name, this is the name of your character. You get again the choice to go to Town or stay in the Training Grounds. So pick 'Apply for training.'
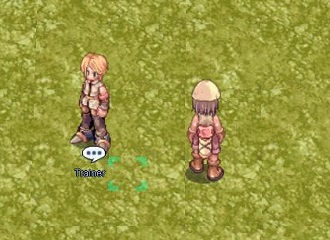
Now you are in a larger map. There are several NPC's here who are interesting to talk to.
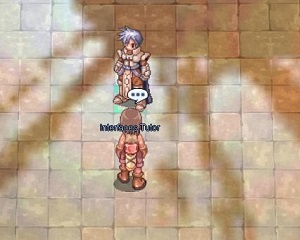
3. Find the Interfaces Tutor.
Tell him you want to learn more about interface fundamentals. You will get 1 Base level, 1 Job level and a Tattered Novice Ninja Suit. Talking to him one more time will send you near the Skill Tutor.
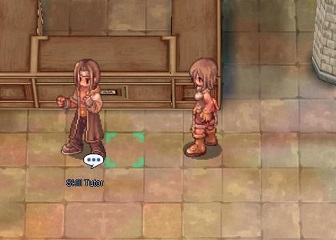
4. Find the Skill Tutor.
Let him teach you how to use skills. You will get 1 Base level, 2 Job level and the skill First Aid.
5. Find the Item Tutor.
Talk to her and tell her you have come to attend the class. You will get 2 Job level, 51 Novice Potion, a Somber Novice Hood, Novice Slippers and a Novice False Eggshell.
6. Now talk to Kafra Employee next to the Interface Tutor. (Be carefull you don't spam enter or she will warp you.) Ask her about Kafra services. Read all the services.
You will get 1 Base level, 1 Job level, 10 Fly Wing and 2 Butterfly Wing.
(Optional) To the east of the Kafra Employee you find a portal you find 3 Instructors, they all can teach you something about HeRO.
7. Now you are done in this room, go to the portal west of the Skill Tutor.
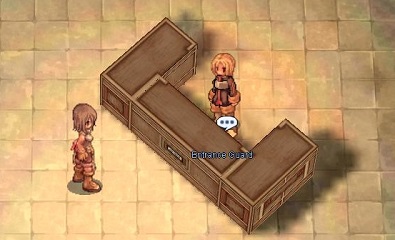
You are now in a room with 3 NPC's. In order to talk with the Entrance Guard you need to speak with the Helper first.
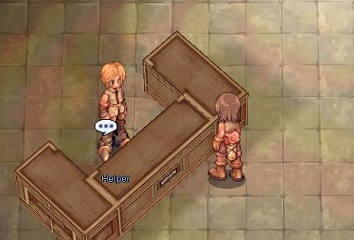
8. Find the Helper.
So talk to the Helper. Follow the instructions from the Helper. You will get 1 Base level.
9. Find to the Entrance Guard.
Talk to him and take the test. You need to get 2 Job levels You will get 300 Novice Potions.
10. You now get warped to a field with monsters on it. You also see an NPC if you want to fight stronger monsters talk to this NPC and he will warp you to another field.
Note: If you die on the field with the monsters you will be warped back in the map where you can find the Entrance Guard. If you talk to him again you will be warped back to the monster field, but you get 1 Base level and 50 Novice Potions
Note: Might be best if you go to job 10 on the field, by doing this you can directly start the Job Change Quest (or use the Job Changer)
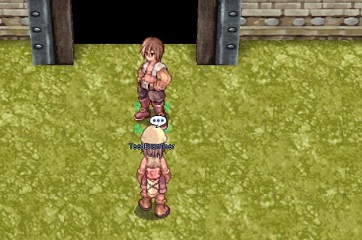
11. Once you got your levels find the Test Examiner.
Talk to him and tell him you are ready for the next course. You get warped to another map again. You can find 2 NPC's here.
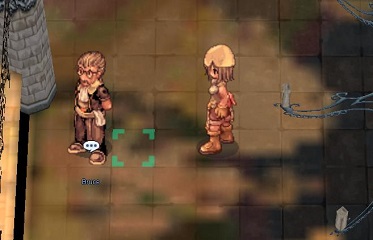
12. Find Bruce.
Talk to Bruce about the jobs there are and which one you have in mind.
13. Find Hanson.
He will give you an option to do a course of questions to find out what job suits you or get warped to a random town. At the end of the course you can pick the job you want yourself or the job recommendation from the course. It can be fun doing the course and just play with the job you get. When taking the course you get 4 Red Potions, 2 Yellow Potions and 2 Green Potions.
Swordsman = Izlude
Mage = Geffen
Merchant = Alberta
Thief = Morroc
Archer = Payon
Acolyte = Prontera
When Hanson warps you you also get 5 Free Ticket for Kafra Storage, 5 Free Ticket for Kafra Transportation and 1 Adventurer's Suit.
Starting Out- Beyond Novice Island
Welcome Lady NPC
When you first join, you must pass a test with the Welcome Lady NPC. The test questions have you answer about the rules and how to follow them. When you pass the test, the Welcome Lady will reward you with some items. These include the following:
- Field Manual x1 (Save this, you’ll want to use it when higher level)
- Old Purple Box x1 (You can open this or sell it to an NPC for 5,000 Zeny without Overcharge)
- Little Lamb Hood x1 (3DEF Base, +100HP, if level is 30 or under 50% chance to gain Zeny for each monster killed)
- Adventurer Cloth x1 (4DEF Base, +100HP, if level is 30 or under add +10ATK and +10HIT)
- Adventurer Knife x1 (5ATK Base, Refinable, and +10ATK and +10HIT if level is 30 or under)
Even if you are above level 30, the Adventurer Cloth and Little Lamb Hood still give your character +100HP. Use both till you find something better.
For a bit more information on the Welcome Lady, click this following link: Welcome Lady
It is recommended you go through the official training grounds. Doing this will give you some Novice Potions and easy level ups before you begin your longer grind. At the end, take the test to see which class is best for you. Accept whatever class it gives you, even if it is not the one you intend to become. You can sell the equipment if you wish for a little extra money early on.
Warper NPC
Now that you’re out of the Training Grounds, you may want to do your job change quest. but if you are not in the correct town you may want to walk around to find a Warper. When you first speak with the Warper NPC, you’ll notice some towns are unlocked for free. These are as follows: Prontera, Alberta, Geffen, Izlude, Morroc, and Payon. To gain access to a location on a character, you must speak to the Warper’s Sister to unlock it. Towns cost you nothing to unlock, while Dungeons can range from about 2,500 – 50,000 Zeny to unlock. Some locations cannot be immediately accessed. You must first complete the respective unlock quest, OR choose to unlock the warp as a reward for completing the "Army Supply" custom quest. You can learn more about this feature under the "Taking Sides" section.
Job Manager
There is a Job Manager on the server whom can be found in Prontera’s center square. It is recommended as a newbie to do the first job change quest. For the effort, you receive Zeny and equipment rewards. For your first class change you’ll receive 10,000 Zeny and an accessory (based on your class). For the second, you’ll receive 100,000 Zeny and either a Teacup or Tea Kettle custom headgear. If you choose to do your job change quest, make sure to speak with the Manager afterwards to receive your rewards!
For more information on the job changer, click this following link: Job Changer
Getting Acquainted
Sisterly Affection Quest
Once you’ve hit first class, it is a good time to do the Sisterly Affection Quest. This is a great custom quest to do as soon as one of your firsts because it gives you some easy rewards.
To begin, all you have to do is speak to the Save Point Lady in Prontera Center Square. If you’ve been following the suggestions so far within this guide, you can easily deliver the 6 letters. Zeny should not be a concern if you completed the Training Grounds. You should have tickets for free Kafra Teleportation to the missing locations, while others are already available from the Warper Sister NPC.
If you’re looking for a quick guide of where to go and rewards you receive for this quest, feel free to follow this link: Warper's Letters: Sisterly Affection
Buddy Beanie
Now that you’ve completed the Sisterly Affection Quest, you can begin the Buddy Beanie Quest. This quest also begins with the Save Point Girl in Prontera. She needs your help again and this time she ask you to hunt items for her to make presents for her sisters. As you make each present, the Warper Sister will ask you to deliver them as well. Upon delivery, you also learn more about the server’s features and receive rewards for your deeds.
The best of which is the final prize,the Buddy Beanie!
If the player is Level 85 or below, the following bonuses are given:
- +600HP
- +80SP
- +5% bonus experience from non-boss monsters
This is one of the most helpful hats you can receive for some time while you level early on.
If you’re looking for a quick guide of where to go and rewards you receive for this quest, feel free to follow this link: Buddy Beanie
Item of the Day
Speaking of leveling... Once you are level 51 or higher, you can begin to do the Item of the Day quest with the Healer NPC in any town. If you have the item she wants, you can give them to the Healer. Next you choose what kind of experience rewards you will receive. You can pick to earn Base Experience or Job Experience, or both. Items can be turned in up to three times per character every day. To get the most out of this, try to do this daily quest whenever you are able. If you are unable to get the item alone, ask for help or purchase from another player.
Here is a link to the guide page to see what the item requirements are each day.
Taking Sides
Now that you're starting to settle into the server, it's time to consider joining the Light or Dark Allegiance. The benefits of joining an allegiance are many. These include: access to custom quests, participate in Trial of Heroes, and access to allegiance palettes.
I have no plans to delve too deeply into this topic. One could write a whole guide about the allegiance system alone. So instead, this section will focus on three things that have the most immediate benefit for a newbie. Detailed below is how to join an allegiance, and then details for two repeatable quests.
Joining an Allegience Quest
To join an allegiance is easy. Go to Prontera near the Tool Dealer and speak with the Allegiance NPC there. She will guide you to either Lady Thea of the Light Allegiance or Sir Melot of the Dark Allegiance. And, as with anything else it seems we’ve had to do so far, there is a short quest involved. It isn't difficult to complete. If you are not very strong, focus fighting the weakest monster inside the test room. That’s the one with 20HP, and takes one damage per hit. Once you collect enough badges, leave the testing room and speak with the allegiance leader.
NOTE: Choosing an allegiance will affect your whole account!!! It means you will never need to repeat this quest in the future. Choosing an allegiance is permanent, and cannot be changed without a GM Service.
If you’re looking for a quick guide of where to go and rewards you receive, feel free to follow this link: Joining Allegiance Quest
Army Supply Quest
There are lots of little quests we can do with Lady Thea and Sir Melot. Instead of looking into those right now, we'll focus on the "Army Supply Quest." It may be best to wait till you have some Zeny since some steps in the quest have you purchase items from Shop NPC's. The cost burden may be too much earlier on unless you hit the jackpot with something valuable to sell/trade. The rewards make up for it if you have the funding. There are two reasons to consider doing the Army Supply Quest.
You want to unlock a dungeon, but do not want to do the quest for it. The dungeons you can unlock in this manner include the following: Bio Laboratory, Brasilis Dungeon, Kiel Robot Factory, Mid Camp, Moscovia Forest, Nameless Island, Nydhoggur’s Dungeon, True Poring Island, and Rachel Sanctuary. Just a heads up, if you unlock Kiel Robot Factory, you can only access the first floor unless you have the Key required to enter Level 2. It is not recommended to unlock Mid Camp. It will not let you gain access to the additional quests there. If you want access to Midcamp without doing the quest, ask a priest to warp you there. You can always do the unlock quest if you so desire as unlocking the warp via this method does not affect quest progression.
You would like to obtain a Light/Dark Stylish Cap. This hat provides the following bonuses: +15ATK, +5%MATK, +1HIT per refine, +100HP per refine, +1MDEF per refine. This hat may be just the thing you need once you can no longer receive the Buddy Beanie’s bonuses.
As for the custom quest itself, it consists of you gathering supplies for your allegiance. Some of the items you will need to hunt or buy from players, but others you purchase from a weapon or armor shop. Upon completion you can choose to unlock one of the maps listed above, or to receive a Light/Dark Stylish cap.
For a guide to the quest, you can go to the following link: Army Supply Quest
Monster Extermination Quest
The other repeatable quest is a monthly repeatable called the "Monster Extermination Quest." Recommended for players under 89+. For those who do not have a lot of respectable gears yet, this can be a nuisance to complete due to time factors and difficulty of some mobs. If you feel confident that you can take this quest on, or have others to work with you, these are the rewards for completion:
- Allegiance Points x5
- Life Insurance x4 (If you use the item before you die, you will not suffer any experience loss)
- Gold x3
- Old Purple Box x2
- Lunatic Card x1 (Hatter Card, learn more about that in later section)
- Base Experience based on your level, with the highest amount earned at 90-99.
- Job Experience if you are job level 50+.
To learn more about the item lists and where the moving NPC’s are located, check out this link: Monster Extermination
That pretty much concludes this section. If you still want some Allegiance Points and other goodies, you can check out what’s available here: Light/Dark Allegiance
Traveling for Fun & Profit! ...Part 1
This section details the various official, yet customized dungeons on the server. If the items are renewal based, their effects have been changed to fit into our non-renewal server. Again, a whole guide could probably be made about custom dungeons. Instead I'll be focusing on dungeon overviews and drops. If you have questions about leveling as a location, you can ask here, or make a new topic.
Hopefully this section highlights the extensive work done to create a fun experience you cannot get anywhere else.
These are organized by order of release.
Splendide Field
Difficulty: Medium-Hard
Experience: Decent mix of Base and Job gain here depending on what you fight.
Items: Fur, Mystic Horn, Soft Feather, Bee Sting, Golden Paw Bracer, Magic Beans, Meat Skewer, Vegetable Skewer, Sprint Ring, Sprint Shoes, Sprint Mail, Whip of Balance, Pinguicula Corsage, Shield of Naga, Armor of Naga, Pike, Battle Fork, Long Horn, Angelic Ring, Exorcising Ring, Luciola Vespa Card, Hilsrion Card, Pinguicula Card, Cornus Card, Dark Pinguicula Card
It is very difficult for most classes to farm the monsters solo at these fields as a newbie. Monk types with some money are able to Asura Strike the Cornus and Hilsrion outside the Nyddhoggur Dungeon entrance. Priests are also able to Turn Undead the Dark Pinguicula. Beware the potential double Nepenthes she may spawn upon her death. And last, but not least, with a party you can easily defeat Pinguicula, Luciola Vespa, and Naga on the Spendide 02 Field Map.
Manuk Field
Difficulty: Medium-Hard
Experience: Decent mix of Base and Job gain here depending on what you fight.
Items: Peaked Hat, Fur, Mystic Horn, Soft Feather Professional Cooking Kit, Meat Skewer, Stem, Plant Bottle, Mandragora Cap, Cello, Lunakaligo, Mink Coat, Cold Heart, Black Cat, Sprint Mail, Long Horn, Angelic Ring, Exorcising Ring, Bradium Shield, Strong Shield, Tatacho Card, Centipede Card, Centipede Larva Card, Cornus Card, Bradium Golem Card, Nepenthes Card
If you happen to be a magical type and have a Bathory carded armor, you could consider farming Nepenthes. It is recommended if you do this to try to kill the Centipede Larvas as well for their card drop. The card’s effect gives it a lot of value in trades or vend. If you have a decent party setup, you can also consider farming Tatacho or Bradium Golems. They both have respectable drops as well that you can keep for yourself or trade to others.
Nyddhoggur’s Nest / Root of Yggdrasil
Difficulty: Very Hard
Experience: Favors Job over Base, but both will rise at a steady pace if you manage to not die a ton here.
Items: Acid Bottle, Bottle Grenade, Honey, Anodyne, Aloevera, Pinguicula Corsage, Dragon Vest, Dragon’s Breath, Withered Branch Staff, Vital Tree Shoes, Tights, Minstrel Bow, Tidal Shoes, Bradium Stone Hammer, Dagger of Hunter, Bradium Shield, Strong Shield, Kaiser Knuckle, Gauntlet of Hit, Veteran Hammer, Barrage Fist, Robe of Cast, Waterdrop Brooch, Veteran Sword, Veteran Axe, Bradium Ring, Bradium Brooch, Bradium Earring, Bone Plate, Proxy Skin Manteau, Cardo, Dragon Slayer, Dragon Wing, Dragon Killer, Dark Shadow Card, Aqua Elemental Card, Draco Card, Phylla Card, Rhyncho Card, Dark Pinguicula Card, Ancient Tree Card
Nydhoggur on this server is extremely difficult due to its customizations. If you can get with a strong group, the drops will more than make up for it if you get lucky. The cards that drop are okay, but the real money makers are the Bradium Accessories and Dragon Vest. Of course, you definitely can’t complain when a Veteran Sword or Dragon Manteau drops. And if you get to tag along as a newbie there is definitely value in the MVP’s drops. They are still some of the best in the game. Only those who don’t mind potentially losing experience should bother.
Brasilis Field + Dungeon:
Difficulty: Easy
Experience: Favors Base Experience
Items from Field: Poison Spore, Mushroom Spore, Karvodailnirol, Meat Skewer, Bomber Steak, Sandals, Hood, Mace, Inverse Scale, Headless Mule Card, Toucan Card, Cuipura Card
Items from Dungeon: Aloevera, Poison Bottle, Poison Spore, Mushroom Spore, Alcohol, Karvodailnirol, Heart of Mermaid, Mage Coat, Angel’s Dress, Scalpel, Gladius, Hurricane’s Fury, Hunting Spear, Pirhana Card, Iara Card
The fields use to not have much of anything that dropped, but now all the monsters have some pretty cool card drops. Headless Mule has a low chance to drop the Inverse Scale Katar. If you gain dungeon access, the location makes for a respectable leveling place at 65-80. Its best done with a mobbing type class such as Assassin, Knight, or Hunter. Rogues, Blacksmiths, and Alchemists can do alright here as well. The money gain here is decent in comparison to similar spots at this level range. If you can farm Iara, you have a chance for Mage Coats, Angel Dresses, Witherless Rose, and Mermaid Hearts.
Scaraba Dungeon
Difficulty: Medium
Experience: Great mix of Base and Job
Items: Honey, Imperial Spear, Black Wing, Green Whistle, Red Ether Bag, Imperial Guard, Bone Plate, Alca Bringer, Meteo Plate Armor, Two-Handed Chrome Metal Sword, Mystic Bow, Claytos Cracking Earth Armor, Scaraba Card
Floor 1 consists of passive insect mobs until targeted. The sword wielders are weaker to physical attacks, and the spear wielders are weaker to magic. If you can get a party, floor 2’s insect floor is mobby. With good teamwork, you are rewarded with a shower of experience. Both floors contain equips that are usable by non-transcendent classes, which makes it sort of unique for something amongst newer dungeons.
Discates Field
Difficulty: Hard
Experience: Great mix of Base and Job
Items: Fur, Peaked Hat, Meat Skewer, Professional Cooking Kit, Stem Whip, Bradium Earring, Mink Coat, Lunakaligo, Cello, Bradium Shield, Strong Shield, Cold Heart, Black Cat, Dolomedes Card, Tatacho Card, Centipede Card, Bradium Golem Card
To reach these fields, you must traverse through the first level of Scaraba Dungeon. Why bother going so far out? Dolomedes made his debut here. Its worth it for the Bradium Earring drop alone. The monster's other loots npc for an alright price. Then add on that a decent monster spawn rate and it becomes worth it, especially for melee DPS. The money is decent, and they also can drop Bradium Earring. When solo, bring fly wings if you cannot fight either Centipede or Bradium Golems.
Byalan 6
Difficulty: Hard
Experience: Great mix of Base and Job
Items: Ring of Water, Fresh Fish, Tidal Shoes, Hunting Spear, Cardo, Saphien’s Armor of Ocean, Dagger of Hunter, Sropho Card, Pot Dofle Card, Sedora Card, King Kray Card, Kraken Card
This location contains fish based monsters. This isn't a place to farm equipment, but experience. If you are looking for some decent money, you could take a crit build or a monk to defeat King Kray. They drop Mystic Frozen as a high rate. There are cards to obtain here, with Pot Dofle, Sropho, and King Kray being the most immediately useful.
Dewata Field
Difficulty: Easy-Medium
Experience: Evenly distributed Base and Job
Items: Stem, Hinalle Leaflet, Aloe Leaflet, Cendrawasih Feather, Soft Feather, Feather of Bird, Alnoldi Card, Argiope Card, Cendrawasih Card
This location requires you to unlock Dewata. You can reach the town from the docks in Alberta. Look for the NPC who will take you there near the big boat at the docks. The field is pretty good to level off of with mages for your mid levels. Others can opt to come here to fight Alnoldi too as they are not too difficult to kill if you have a fire forged weapon or endow. Cendrawasih is trickier to kill solo as a newbie, but try to obtain10 of his feathers. You can use them later to unlock the Krakatau Volcano dungeon. Since the monster is passive till targeted or attacked there's a way to cheese this if solo. Use a thief class character and steal from the monster.
Tina Grace Cave
Difficulty: Medium
Experience: Favors Base Experience slightly over Job Experience
Items: Fang, Hinalle Leaflet, Rough Oridecon, Magic Bible Vol. 1 Butoijo Card, Gajomart Card, Horong Card, Am Mut Card, Dokebi Card, Banaspaty Card
To access this dungeon all you need to do is unlock Dewata. You can reach the town from the docks in Alberta. Once at Dewata, travel to the northwest exit to the field, the cave will be in the southwest corner of the map. I recommend getting another person or two for this place. The narrow lanes of the cave make it ripe for monsters to be spawned very closely to one another. It makes for a great mobbing location if you have a Wizard in the party. This is one way players can obtain the very useful mage shield Magic Bible Vol. 1 without need for guild dungeon access. If you get particularly lucky you may get any of the card drops here and they are all useful for one reason or another.
Krakatau Volcano
Difficulty: Medium-Hard
Experience: Very even Base and Job, especially if focused killing only Comodo
Items: Reptile Tongue, Mane, Comodo Leather, Grape, Anodyne, Bowman Scarf, Tidung, Ginnungagap, Blood Tears Comodo Card, Ancient Worm Card, Gullinbursti Card, Argiope Card, Savage Card
This map is similar to Tina Grace Cave above. Its a very narrow laned map filled with monsters. The experience gain per monster killed is pretty good, and with decent mobbing skills can become fantastic. Save the Comodo Leathers that drop to later craft and enchant Keris (repetable) at the Dewata Field map. Recommended you bring a party as a newbie. If you are a wizard with fast enough cast and skilled in either Safety Wall and/or Firewall use, you may be able to solo. Watch out for Leak, she's a nuisance and loves to mess up with any decent setups you might have.
Nightmare Pyramid
Difficulty: Medium
Experience: Base focused. Pretty amazing if you can kill Ancient Mummy, she gives over 100k base experience per kill.
Items: Hammer of Blacksmith, Immortal Heart, Panacea, White Herb, Lemon, Rosary, Glove, Brooch, Earring, Sphinx Hat, Tablet, Sage Diary, Nightmarish Minorous Card, Nightmarish Mummy Card, Nightmarish Verit Card, Nightmarish Mimic Card, Nightmarish Arclouse Card, Nightmarish Ancient Mummy Card
This dungeon came out last year. It consists of stronger versions of a variety of mobs. Sadly, there isn't much reason to come out here other than for the following:
- You're here for the dailies, there are rewards for completing them along with some experience.
- Heal Bomb, Turn Undead or Grand Cross the Nightmarish Verits and Mummies for exp.
- You have the Turn Undead skill and want to have an easy target with Nightmarish Ancient Mummy.
After that, its hard to justify most newbies sticking to this place long term for the drops. They aren't particularly interesting, and there are better places to acquire many of the items listed (unless they're cards).
Malangdo Island Dungeon + Instance
Difficulty: Very Easy - Medium
Experience: Very nice mix of Base and Job
Items for Dungeon: Large Jellopy, Delicious Jelly, Poor Can, Aster Hairpin, Starfish Headband, Fish Pin, Fisherman's Dagger, Cutter, Siorava Card, Red Eruma Card, Wild Rider Card
Items for Instance: Poor Coin Bag, Normal Coin Bag, Hairtail, Marlin, Saurel, Tuna, Malang Crab, Small Octopus Card, Pot Dofle Card
Its easy to reach this dungeon as a newbie. There are several routes to reach the town of Malangdo which you need to reach the dungeon there.
- Travel to Izlude and near the docks at the top right of the map is a Cat NPC who will warp you there.
- Travel to Alberta, go to the docks at the eastern side of map. You can warp directly to Malangdo from there or travel via Neko Isle to Malangdo.
- Travel to the Pharos Beacon from Comodo. Go down the stairs near where you warp in, and to your left you will find the Cat Sailor NPC who will warp you to Malangdo.It costs 5,000 Zeny with the Cat NPC's to travel to Malangdo. This does not including extra costs for warps depending on how you travel there. After unlocking the town, you can walk to the first red dot on your map to the northwestern portion of the map.
The first floor is for newbies who want to level up characters off of Siorava. Siorava drops both Jubilee and Large Jellopy, hold onto both to unlock True Poring Isle later. Red Eruma is a bit tougher, and I recommend saving the Poor Cans he drops. They currently do nothing but will be necessary to have when the rest of the region's content is released. If you want to fight Wild Rider, he drops two headgears no other monster drops currently. Their effects aren't too potent so recommended only if you're a hat collector.
For the instance, its recommended you come back at level 80+ with a party (minimum 2 players). The party leader unlocks the instance and you get to beat up a bunch of monsters on your way to fight a pervy octopus. This isn't an instance you go to for the drops, but the experience is decent for the amount of effort and time put into it.
Traveling for Fun & Profit! ...Part 2
This section is part 2 of the dungeon overviews, this on focusing now on the fully customized lands you can reach.
These dungeons are organized by their difficulty.
Neko Island
Difficulty: Easy
Experience: Focuses on Job Exp. There are Wild Rose and Nekoring to provide Base Exp.
Items: Catfoot Hairpin, Black Cat, Nekoring Backpack, Wild Rose Card, Leaf Cat Card, Autumn Leaf Cat Card, Nekoring Card
To reach this location head to the Alberta docks and find the Cat NPC. The NPC will ferry you over to the island for 5,000 Zeny. This place has some of the best loot you can pick up and sell so early in your leveling journey. Only problem is that there is such a huge skew to Job Experience that you may wind up very low level upon reaching Job 50. You will want to balance out your levels elsewhere. Farming Nekoring for Base experience won’t cut it forever.
True Poring Island
Difficulty: Easy-Medium
Experience: Even distribution of Base and Job
Items: Jellopy, Fabric, Green Salad, Celebration Wings, Panda Hat, Mooring Backpack, Sapling Backpack, Pandaring Card, Sapling Card, Aquaring Card, Applering Card, Green Applering Card, Whispering Card, Teddyring Card
You can unlock this location along with Poring City at the same time. All you need to do is Jellopy x10, Jubilee x10, and Huge Jellopy x10. This location is for either the experience or for the loots listed above, as its not very profitable to sell the random loot to the shop NPC.
Poporing Island
Difficulty: Medium
Experience: Respectable. An even gain for Base and Job experience. Cupcakering and Teddyring are the best here for both.
Items: Jellopy, Delicious Jelly, Piece of Cake, Honey, Professional Cooking Kit, Bearfoot Special, Teddybear Hat, Drooping Ninetail, Cupcakering Card, Teddyring Card, Orcring Card, Jailring Card
This place is similar to Byalan 6, in that the overall drops suck, but the experience is amazing. The drops were recently updated and the place gives far more Zeny from drops than it did before the update. Foxring now also can drop the cute Drooping Ninetail headgear. After you unlock Poring City, you can unlock this location. All you need to do is help a spastic Arc Angeling with his hunger problems. If you decide to come here, it’s probably to hunt Cupcakering. But you’ll be forced to fight every other monster here, so be prepared for that. Still, this is a great place to level if you can manage it until probably around 90-something.
Fairy Paradise
Difficulty: Varies. Easy if only targeting Garden Keeper, Brilight, and Rafflesia. Medium if targeting Mavka and Pinguicula. Hard if targeting Garden Watcher.
Experience: Pretty decent for both Base and Job.
Items: Herbs, Alcohol, Belcarf, Renown Archer Scarf, Geledria, Weeder Knife
Get ready to pay 50,000 Zeny or win yourself a Pixie Letter at the Fairy Auction to enter this location. Is it worth paying the money? Yes, especially if you plan to kill all the monsters in there. It is highly recommended for extended stays at the location to bring a pet that can hold your loot. Herbs will drop in abundance here. If you’re lucky, when they are defeated, they may spawn a flower plant you can also tear up for even more loots!
Muspelheim
Difficulty: Medium - Hard
Experience: Fantastic for Base and Job. No experience penalties occur if you die on the maps. Auto-resurrections occur at certain intervals.
Items: Spark of Muspelheim Small Life Potion, Big Defense Potion, Big Magic Defense Potion, Gold, Enriched Ore, Enriched Elunium, Enriched Oridecon, Glove, Eye Stone Ring, Angel’s Dress, Eye of Surtur Card, Selkie Card
The event dungeon. At two specific times every Monday, players gain entry to this location. The entry of which is in Niffleheim. The only other way to access this special dungeon is via the hosted event, “Mini-Muspel.” The experience and drops are mostly unique, with the very popular “Small Life Potion” being one of the most immediately useful to all. When that item is used, it allows you to rejuvenate your HP over time for a 10 minute duration. Very handy when fighting monsters to lower the amount of potions you may use. After the event, make sure to sell your leftover Spark of Muspelheim. They sell for 25,000 Zeny a piece without overcharge.
Muspel Mondays
Mini Muspel
Muspelheim Monsters
Flooded Yggdrasil Root
Difficulty: Very Hard
Experience: Because of the regular Nydd mobs, this place favors Job over Base experience
Items: Bradium Earring, Bradium Brooch, Bradium Ring, Dreamstone Charm, Staff of Light, Crescent Scythe, Bradium Shield, Aztoe Nail, Ring of Angel's Whisper, Ancient Tree Card, Bradium Golem Card, Phylla Card, Rhyncho Card, Aqua Elemental Card
The custom mobs added to this location actually are really difficult here. The Dreamstone Golem has neat drops, but he's an extremely difficult to kill monster. The Bradium items all have too low a chance to drop to make farming him very attractive. Otherwise, if you're here with a group to kill the boss he has some nice items that you can likely make use of as a newbie.
Thanatos Basement
Difficulty: Very Hard
Experience: Favors Base Experience slightly. Blame Souleater for why it isn’t more even. But that’s even if you can manage to gain any experience without dying too much!
Items: Enriched Ore, Enriched Elunium, Enriched Oridecon, Pantie, Undershirt, Wool Scarf, Tidal Shoes, Green Baby Doll, Kauvra Boots Orcus Bracer, Harthoon Hearth, Quah-Nomag Gloves, Souleater Card, Mane Card, Lifedrinker Card
This dungeon is pretty tough. Most likely you won’t be traversing here for some time unless you get with a group of veterans to party the place. Even then, make sure they are well prepared and have explained what role you are playing while here. Expect to die, a lot! But hey, if you plan to come here, you are here for the loot, not to level.
Warzone
Difficulty: Extremely Hard AND Annoying
Experience: Favors Base Experience slightly. But good luck even getting any experience at this place.
Items: Blank Card, Light Blue Potion, Light White Potion, Blank Card, Witched Starsand, Cobweb, Anodyne, Aloevera, Poison Bottle, Ice Pick, Tomahawk, Survivor's Rod (Dex), Elemental Sword, Krishna, Vali's Manteau, Lord's Clothes, Magic Bible, Valkyrie Shield, Valkyrian Armor, Diabolus Armor, Diabolus Robe, Diabolus Manteau, Dragon Vest, Orlean’s Glove, Variant Shoes, Boyfriend Hat, Girlfriend Hat, Brown Paper Bag, Friend Hat, Guildsman Recruiter Hat, Party Recruiter Hat, Ring of Resonance, Bloody Shackled Ball, Old Card Album, Marc Card, Raydric Card, Noxious Card, Matyr Card, Green Ferus Card, Hydra Card, Zipper Bear Card, Kavach Icarus Card, Sropho Card, Flame Skull Card, Firelock Soldier Card, Verit Card, Porcellio Card, Mantis Card, Agav Card
This place is a terrible trap. The drops look so promising, but dash any hopes you have now of ever getting any of it from this place. The setup of the map and the configuration of monsters you fight makes it impossible to kill for loot. First off, the map is on PvP settings, so if you were to go with a party, you are all separated the moment you first enter. Second, if you die twice, you are automatically booted from the dungeon. Then you re-enter again only to deal with the first problem all over again. As a newbie, do not spend your hard earned war points to access this place either for one time entry or unlimited access.
Do All the Things!
This section details all the fun things you can do to take some time out of your regular grind for experience and items.
Automated Events
These are as they say, events that are scripted to work automatically without GM involvement. There are 7 different events. Five of these actually have you create a novice character to use to participate. Two others in have you use your regular characters. It is highly recommended you join whenever possible as a newbie. The prizes are extremely helpful in obtaining Zeny, Elunium and Oridecon. The link below links you to all the automated events, and if you go to each Novice Event page, you’ll find more information on rules, tips, and prizes.
Mini Muspel
Similar the regular Muspelheim that opens on Mondays, except two things. One, the dungeon is only open for 30 minutes, and two, the drops from Fafnir and Surtur differ. You earn prizes in this event based on the “Stage” you reach in attempting to defeat Surtur. Only recommend attending if you have a party as a newbie. If you get to go, the experience gained from the event is pretty insane. You'll more than likely get at least one level even in your high 90's as a non-transcendent character.
Mystic Tower
This event is like Endless Tower, but smaller at only 25 floors. Each floor's monsters are different than in the normal Eternity Tower dungeon. You gain prizes in this event by reaching certain floors. This event is not meant to be taken on solo. Get into a party to gather some experience and level up. Worth going to when its available and you get into the party that creates the event.
Fabre Tame
The first of the novice events discussed in this guide. It is pretty obvious what the goal is. It's to capture as many Fabre as possible for prizes of course. You are given 20 Novice Fruit to heal with, and 50 Lucky Clovers to use to tame the bugs with. Your prizes improve based on how many eggs you capture. Prizes include the chance for Soft Feathers, Oridecons, or Witherless Roses. If you have 23 eggs you can even earn a Damp Card Album! Do not skip this event if you have any skill with taming monsters.
Novices Vs Taini
This event pits you and your fellow Novices against the spellcaster, Taini. Your goal is to gain as many levels as possible in the 6 rounds you fight. The little bear spellcaster drops loot when defeated, and it might go to you. A treasure box or two from the event will net you a lot of Zeny in a short time span. Your prizes at the end are based on your level. You can use the Taini Stars earned from the event to pick up two pieces of custom gear, and an egg of Taini. This event is pretty fun, even if you're not interested in the gears given by Taini Stars or Scroll Package rewards. You should still go for a chance at the loot the spellcaster drops.
Poring Smash
When you go to a Smash event, get ready to kill a dazzling number of ‘ring event monsters. Kill as much as you can to gather all sorts of loot to keep or sell later. For the hat collectors out there, Smash Bombporing drops a decent hat of himself you can wear. If you defeat the Masterpoporing or Mastermarin at the end, you also earn a Poring Card to use for the Hatter NPC. If there's any leftover time, the special Lovering mob will spawn. They drop slotted basic gears such as Hood. Go to this event, it is worth your time. Many of the various drops you can use for yourself, sell to an NPC, or vend.
Wordzzle
This event has you as Novices essentially playing the gameshow Wheel of Fortune. Well, except instead of spinning a wheel, you hunt books down that contain various letters of the alphabet. The Bat Host will provide you with a category and the number of words in that category. Your goal is to figure out the word before anyone else. Even if you do not know the word, try to submit letters to the Bat Host. You earn pages (points) for each correctly guess letter, and for signing up at the start of each round. Prizes improve based on how many pages you obtained before the end. This event isn’t for everyone, but if you get decent at it, the prizes are very good. This is the only event that awards you with Battle Manuals. Use them to increase your Base Experience gain for a short time.
Zombie Run
Get ready to run like a chicken with its head cut off from them Zombies and Ghouls. Gain badges along the way, which in turn you give to the Event Representative at the end for prizes. The more badges, the better the prize. Do well in this event and it is a nice way to get Damp Card Albums for more cards. Not this writer’s personal favorite event, but it is easy at least to obtain 20 badges for a Zombie Card. Definitely go for that prize alone.
Holiday Questing
Throughout the year, the server will have special holiday events you can take part in. As long as your level is high enough, it is a good idea to go through them. Generally you receive some very powerful or useful gears from them. Plus you receive rewards such as Hatter Vouchers, Card Albums, and Experience. Even though you may have missed your chance for some of these items in the past, do not fret. You can always choose the option to get an older gear instead of the newest.
To see past offerings you can go here: Seasonal Gears
Special Events
Some events have a set time to attend if you want to participate. GM's announce these on the forums, the Facebook group and with random reminders from GM’s in game. These events tend to be the most varied and special due to their limited time nature. There are monthly events (Trial of Heroes and Fairy Auction), to other unique things such as the Ninja vs. Gunslinger competitions or even other special Light/Dark Allegiance Events. Decide on a case by case basis if you can attend or not. But try to go if you meet the requirements, as the best rewards tend to come from these.
Forum Events
Always check the forums for updates for events only announced there. Some of these include looking for the Crazy Merchant, Screenshot Contests, Riddles and Mission BBS’s.
Understand that some events happen spur of the moment such as Monster Invasion. The GM’s like to be spontaneous and will host certain kinds of things for fun. Feel free to go if you are in game and not doing much else at the time. Monster Invasion events for example provide loads of easy experience and items. Some of the latter may be difficult for you to get early on otherwise. For example: in the past I've obtained items like a Dragon Vest and Lich Bone Wand .
All About Them Points
There are three types of points you can collect on the server that you can exchange for rewards. It is highly recommended you participate in earning points in all three when able.
Vote for Points
You can vote on two websites every 12 hours from the control panel. By doing so, you're awarded with V4P Points you can trade in for various rewards. Talk to the GM-NPC in Prontera to access the V4P Shop. There's a lot of rewards in there, but the most important to a newbie like yourself will be the gears. The available gears in the shop changes month to month. As it requires 50 points to get a gear, you generally will only be able to afford one per month. Try to focus on which gears you need the most and make sure you save your points for them.
Vote for Points
Vote for Points Gears
War Points
To earn these unique points, you must register with the War Agent before or during War of Emperium hours. Every minute, you will earn 1 War Point. If you are Level 85+ you begin to earn some Base Experience every minute inside the castle as well. Participating in heRO’s Battlegrounds will also let you score War Points. Points are exchanged with the War Agent outside of every castle. I recommend picking up the War Boots and War Cape. The first provides you with a Verit-like shoes that provide 7% HP and SP. The second item gives 10% resistance to neutral property. It may also be worth considering the Elven Gears. If refined to +6, they provide a +1 stat bonus to a certain stat and 9% Demi-Human resistance. Do not use your War Points to purchase either one time access or permanent access to Warzone. Your points are better spent on any of the other rewards that the War Agent provides.
WoE Point Gears
War of Emperium
Battlegrounds
Once you become Level 89, you can begin to participate in Battlegrounds. On heRO, Battlegrounds works differently than it does from officials. The modes are similar, but there are minor differences mainly in participation time and rewards received. Your first 100 matches on each character only cost 3,000 Zeny. Within that time frame, you can most definitely get a few rewards at least. Whether you win, lose or tie, you gain some Experience, Battlegrounds Points and War Rewards Points.
Battleground Rewards
Battleground Gears
These Fit Nowhere Else~
This section details things that are important to mention, but didn't know where else to categorize them.
Hatter
If you’ve been going to events, you’ve probably gathered a decent number of certain cards from them. You’ve probably also wondered, “What are these Poring Cards for?” Wonder no longer, you can give them to Mr. Hatter in his first game with you. If you go along and play his 5 games you can earn a cool hat at the end. But if those hats don’t interest you, then you can always sell cards from the Hatter List for 300,000 – 400,000 Zeny to others.
Monster Dropped Gears
There are several hats and backpacks that drop from monsters. There are some that are worth either buying or getting yourself. Each Monster Dropped Gear comes from the monster that it resembles. For example, Drops Hat can be obtained from Drops itself. Most of these hats do not have much value. You may be able to purchase or trade from fellow players on the cheap. If you love collecting hats, this is an easy place to start your collection.
Wings
A type of gear that is unique on the server. They'll prove very potent if you have the Zeny and/or capability to farm the ingredients. Let me note a few that matter below.
- Red/Blue Pixie Wings: Offered at Fairy Auction. Currently obtainable for 2-5million. Red Pixie Wings gives +30 Atk, while Blue Pixie Wings give +8% Matk. If you got some extra money, you can also try to win a Drooping Pixie at the auction as well. The hat has a decent combo with the wings.
- Elemental Wings: These are pretty cool. They give you an elemental armor effect, +2 to all stats, enable use of a lvl 3 bolt, and access to a special color palette. The tricky part is obtaining the card. You'll need a Sandman Card for Earth, Dokebi for Wind, Swordfish for Water and Pasana for Fire.
- Flower Wings: These have a high base defense, and even give a +20 Mdef bonus. They are refinable, and can be crafted as often as desired with the NPC. One of the better tank gears you can access, and the item list is far from the longest or the worst to collect as a newbie.
- Bee Wings: The item list for this quest is huge, but you gain access to an equipment that lets you farm all kinds of items. Some of these include Stems, Immortal Hearts, Cobwebs and more. Even if you need none of the items from the list you can equip the wings and vend whatever drops from them.
- Zodiac Wings: A slotted wing with some minor bonuses included. The item list is pretty large for it, but worth crafting if you have a strong card to put inside.
- Avian Wings: These were recently boosted in their effect. Like Bee Wings, these wings have a very extensive item collection list. If you're an Agility based class, crafting these will be an obvious upgrade to your Pantie + Undershirt combo.
Keep in mind that there are tradeoffs for using Wings, as they take the lower headgear and armor slots. One benefit of wings, if its a slotted one, allows you to card either Headgear or Armor cards. Another benefit for the slotted wings is a unique effect known as the Double Wing Effect
Rough Enriched Ore
You earn these typically from events. Gather enough Enriched Ore and you can take it to Payon to make Enriched Oridecon or Elunium. It takes 15 Enriched Ore to make Enriched Oridecon and 20 to craft Enriched Elunium. You can use the items to lower chances of breaking gear when refining it.
